
Set Up WooCommerce powers 23% of the top 1 million e-commerce sites worldwide. It’s free, open-source, and deeply integrated with WordPress. Combined with Elementor Pro, it gives you a fully designed, brand-consistent online store that you can manage without a developer. This guide walks through the complete setup, from installation to your first live sale.
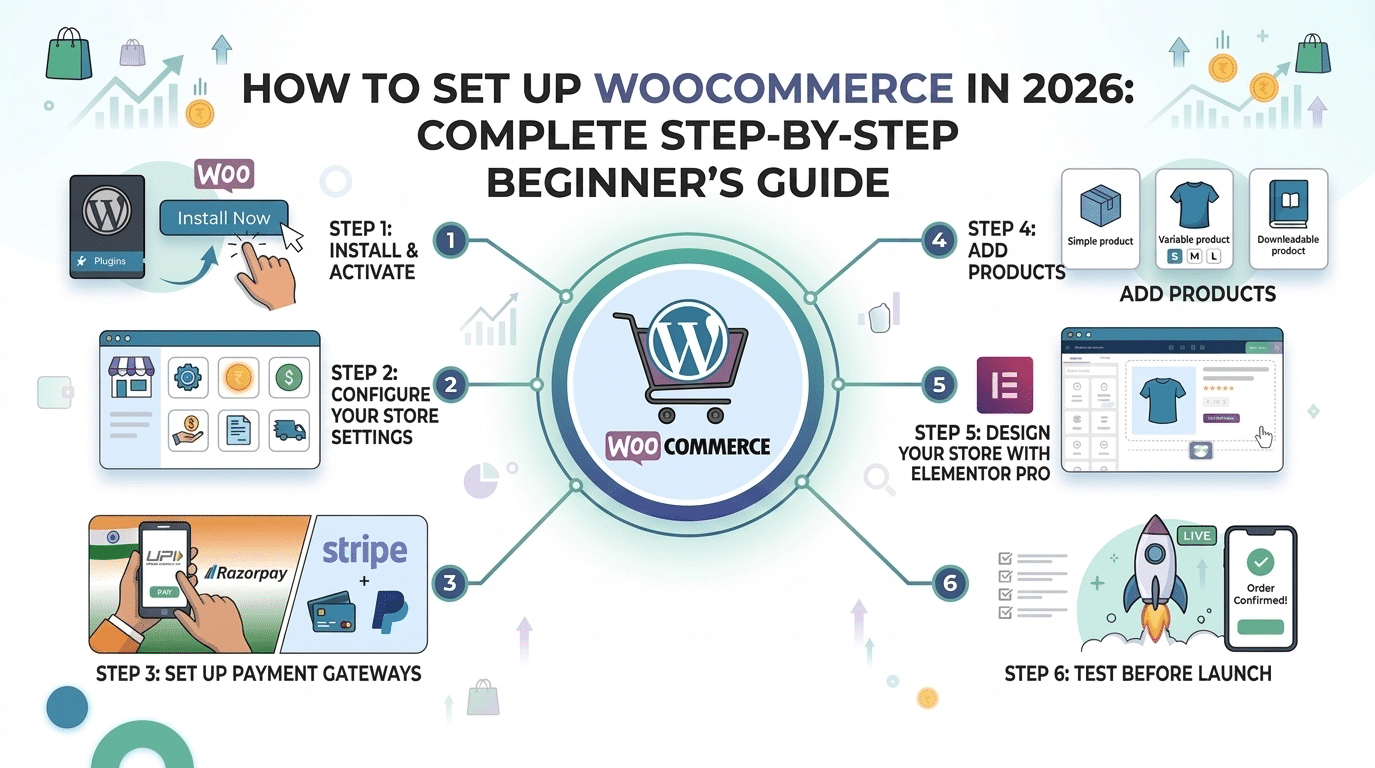
Step 1 — Install and Activate Set Up WooCommerce
Go to Plugins > Add New, search for Set Up WooCommerce, install, and activate it. Set Up WooCommerce setup wizard launches automatically. Complete the wizard: store location (India or your country), currency (INR or USD), industry, and product type. Don’t stress over every choice; all settings are editable later from WooCommerce > Settings.
Step 2 — Configure Your Store Settings
Go to Set Up WooCommerce > Settings. Key settings to configure:
- General: Store address, currency (INR recommended for Indian stores), enable/disable tax
- Products: Weight and dimension units, enable reviews, show sale badges
- Tax: Enable if you charge GST. Set up tax classes (Standard rate = 18% GST for most products)
- Shipping: Set flat rate shipping zones for different regions. For digital products, set free shipping or no shipping
- Emails: Customise customer email templates with your brand colours and logo
Step 3 — Set Up Payment Gateways
For Indian Businesses — Razorpay
Razorpay is the standard payment gateway for Indian Set Up WooCommerce stores. It accepts UPI, all major debit/credit cards, net banking, and EMI options; no separate setup is required for each payment method.
- Install the free ‘Razorpay for Set Up WooCommerce plugin from Plugins > Add New
- Create a Razorpay account at razorpay.com, go to Settings > API Keys
- Copy your Key ID and Key Secret and paste them into Set Up WooCommerce > Settings > Payments > Razorpay
- Enable Test mode first and place a test order. Switch to Live mode after confirming it works
For International Businesses — Stripe or PayPal
Stripe (via the Set Up WooCommerce Stripe plugin) and PayPal (via Set Up WooCommerce PayPal Payments) are the two most-used international gateways. Both have official free Set Up WooCommerce plugins. Configure the same way — install the plugin, create an account on the payment provider’s site, paste your API credentials.
Step 4 — Add Your First Products
Go to Products > Add New. Set Up WooCommerce product types:
| Product Type | Use For | Example |
|---|---|---|
| Simple product | Single item, no variations | An ebook, a specific service |
| Variable product | Items with size, colour, or option variations | T-shirt in S/M/L, colour options |
| Grouped product | A set of related products sold together | Bundle of related books |
| External/Affiliate | Product sold on another site | Affiliate product link |
| Virtual | Digital or service product (no shipping) | Consultation, digital download |
| Downloadable | File delivered after purchase | PDF guide, plugin, template |
For each product: set Title, Description, price, sale price (optional), product category, product tag, and Featured Image. Add a product gallery in the right sidebar. Stock management is in the Inventory tab, enable if you have limited stock.
Step 5 — Design Your Store with Elementor Pro
This is where Set Up WooCommerce transforms from functional to beautiful. Elementor Pro’s Set Up WooCommerce Builder gives you design control over every part of the store:
- Shop Page: Design the product grid layout in Templates > Theme Builder > Product Archive
- Single Product Page: Custom layout with your brand styling via Templates > Theme Builder > Product
- Cart and Checkout: Use Elementor’s Cart and Checkout widgets to match your brand
- Shop Header: A separate header for the shop area with different CTAs (e.g., ‘My Account’, cart icon)
Step 6 — Test Before Launch
- Place a test order in Razorpay test mode — complete full checkout flow
- Check all order confirmation emails are delivered
- Verify the Thank You page displays correctly
- Test on mobile — mobile checkout is where most Set Up WooCommerce conversions are lost
- Check the Google Analytics 4 e-commerce tracking is firing correctly
- Switch all payment gateways from Test to Live mode
We Build WooCommerce Stores That Sell
Full WooCommerce setup, Razorpay or Stripe integration, Elementor Pro store design, and product loading — all included. Hopeleaf Technologies builds WooCommerce stores for Indian and international clients.
- Get a WooCommerce quote → hopeleaftechnologies.com/contact-us/
We Build Every Site in Elementor Pro
Hopeleaf Technologies is a specialist Elementor agency — we design in Figma and build in Elementor Pro on WordPress. Fast, editable, and built to rank on Google.