A landing page and a homepage are fundamentally different things. Your homepage introduces your brand. A landing page has one job: get the visitor to take a single, specific action. The moment you add anything else, navigation, unrelated links, multiple CTAs, your conversion rate drops.
Elementor Pro is arguably the best tool available for building landing pages on WordPress. The combination of visual design control, form integration, Popup Builder, and mobile responsiveness settings gives you everything you need. But the tool is only as good as the strategy behind it. This guide covers both.
The Anatomy of a High-Converting Elementor Landing Page
| Section | Purpose | Conversion Principle |
|---|---|---|
| Hero | Grab attention, state the value proposition | Above the fold — visitor decides in 3 seconds |
| Problem | Acknowledge the visitor’s pain point | Empathy builds trust and keeps them reading |
| Solution | Present your offer as the answer | Clear benefit, not feature, language |
| Social Proof | Testimonials, logos, ratings, case studies | Remove doubt with third-party validation |
| CTA Section | Primary call to action with form or button | Single action, no competing links |
| FAQ | Pre-empt objections before they stop conversion | Remove the last mental barrier to action |
| Footer CTA | Repeat the CTA for visitors who scroll to end | Second chance for hesitant visitors |
Step-by-Step: Building the Page in Elementor Pro
Step 1 — Create a New Page and Set Canvas Mode
In WordPress, go to Pages > Add New. Give it a name and open with Elementor. In Elementor, go to the hamburger menu (≡) > Settings > Page Layout > set to Elementor Canvas. This removes the WordPress theme’s header and footer, giving you a full-bleed blank canvas. Landing pages should never have site navigation, it gives visitors an escape route.
Step 2 — Build a Compelling Hero Section
Your hero section is the most important real estate on the page. It must communicate what you offer, who it’s for, and what makes it valuable, in under 8 words for the headline and under 25 words for the subheading.
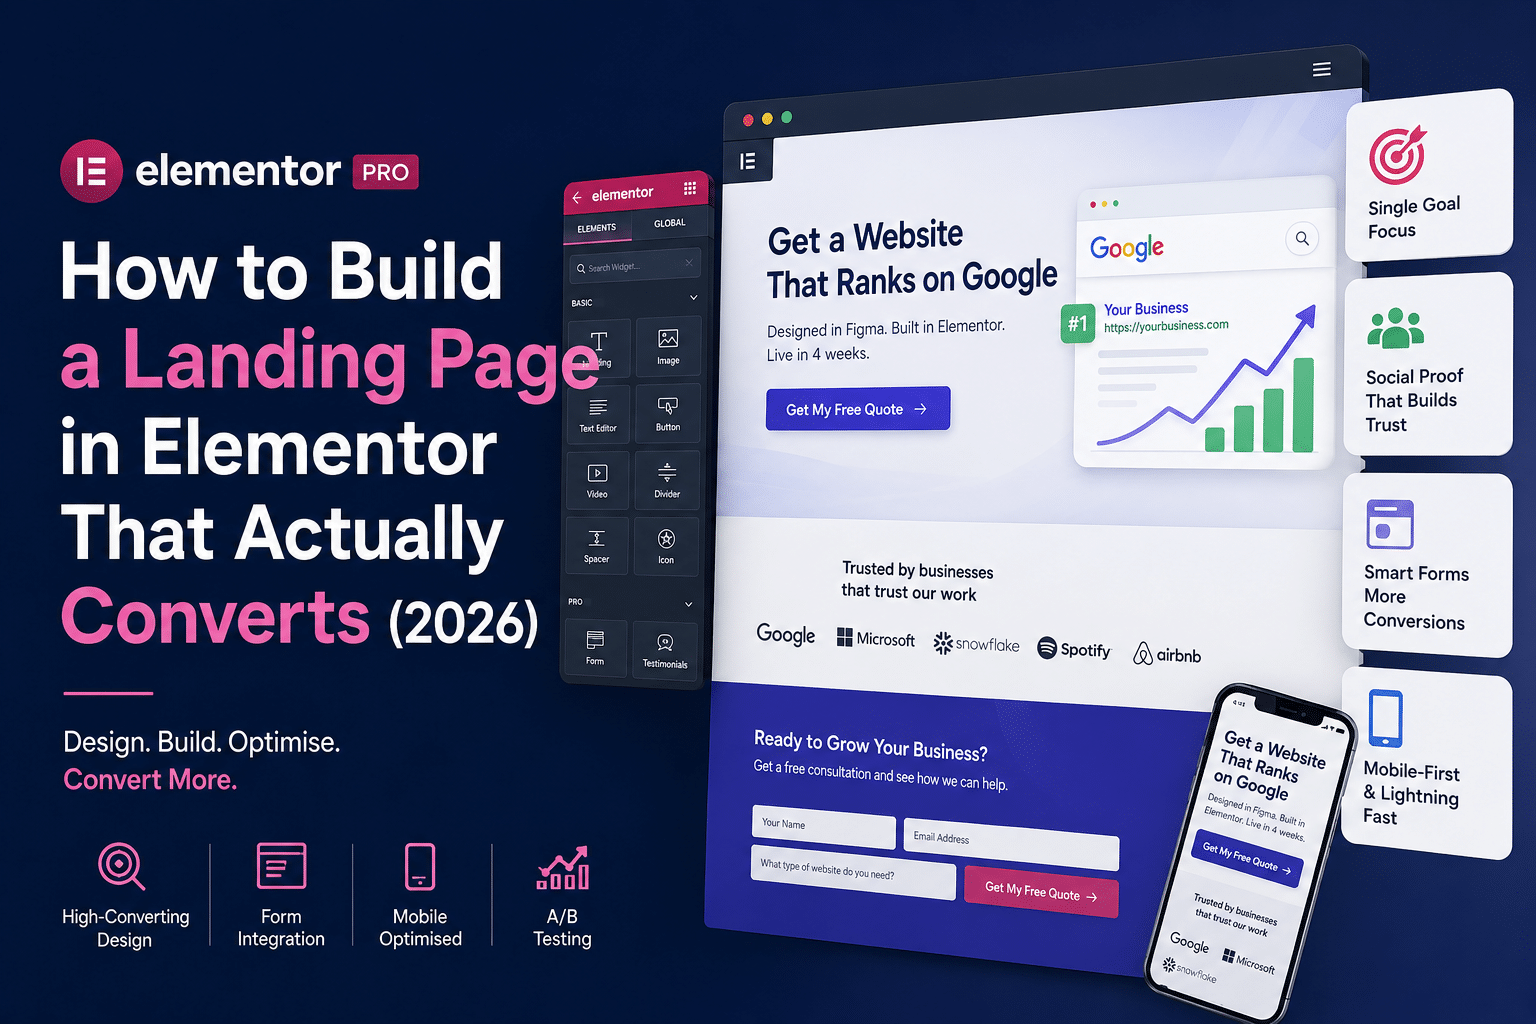
- H1 Headline: Lead with the transformation, not the feature. ‘Get a WordPress Website That Ranks on Google’ beats ‘WordPress Development Services’.
- Subheadline: Reinforce with specifics — location, timeline, or unique mechanism. ‘Designed in Figma. Built in Elementor. Live in 4 weeks.’
- CTA Button: One button. Active verb. Specific outcome. ‘Get My Free Quote’ beats ‘Submit’.
- Hero Image: Show the outcome, not the process. A screenshot of a ranked Google result, not a stock photo of someone at a laptop.
- Use fetchpriority='high' on your hero image in Elementor's Advanced > HTML attributes to tell the browser to load it first. This improves LCP Core Web Vitals and makes the page feel instant.
Step 3 — Add Social Proof Immediately Below the Hero
Place your strongest trust signal directly below the hero, before the visitor has to scroll far. Options in order of effectiveness: video testimonial, star rating with review count, client logo strip (real brands, not generic placeholders), or a short quote with real name and photo.
In Elementor, use the Testimonial Carousel widget (Pro) for rotating reviews or the Image Box widget for individual testimonials with photos. Add a star rating using the Rating widget (Pro) or SVG star icons in an Icon widget.
Step 4 — Build the CTA Section with an Elementor Form
Your primary CTA section should contain: a benefit-oriented heading, a short paragraph reinforcing urgency or value, and the form. Use Elementor Pro’s Form Builder widget, it’s lighter than WPForms and integrates natively with no shortcode needed.
Keep the form short: Name, Email, Phone (optional), and one qualifying question (e.g., ‘What type of website do you need?’). Every additional field reduces completion rate by approximately 10%. For most enquiry pages, three fields outperform five.
Step 5 — Set Up the Thank You Page
After form submission, redirect to a dedicated thank-you page, not a popup or inline message. The thank-you page serves three purposes: confirmation that the submission worked, setting expectations (e.g., ‘We’ll respond within 24 hours’), and a secondary CTA (e.g., follow on LinkedIn, read our blog, view our portfolio). In Elementor Form Builder, set the Redirect URL in the form’s Actions After Submit settings.
Mobile Optimisation — Half Your Traffic Is on Phones
In Elementor, click the mobile device icon at the bottom of the editor to switch to mobile view. Check every section: do font sizes still communicate hierarchy? Are CTA buttons at least 44px tall and full-width? Is the form easy to complete with thumbs? Do images still look good at 375px wide?
- Set separate font sizes for desktop and mobile in Elementor’s responsive controls
- Make CTA buttons full-width on mobile — use Elementor’s Column Width to 100% on mobile
- Reduce hero padding on mobile to keep the CTA above the fold
- Test on a real phone, not just Chrome’s device simulator
Speed — Landing Pages Must Load in Under 2 Seconds
A landing page that takes 4 seconds to load loses 50% of its visitors before they see a single word. Configure WP Rocket, WebP images (under 100KB for hero), and Elementor’s Optimized DOM Output. Use GTmetrix to measure before you launch.
We Build Elementor Landing Pages That Convert
Hopeleaf Technologies designs and builds conversion-optimised landing pages in Elementor Pro. Figma design, form integration, mobile-first, Core Web Vitals passing.
- Get your landing page built → hopeleaftechnologies.com/contact-us/
We Build Every Site in Elementor Pro
Hopeleaf Technologies is a specialist Elementor agency — we design in Figma and build in Elementor Pro on WordPress. Fast, editable, and built to rank on Google.